
Dialing in means testing one change at a time
Dialing in means adjusting your espresso recipe until the drink repeats and tastes balanced to you. Move one thing, keep the rest the same, and taste. That's most of it.
Five notes make up the recipe:
- Dose: dry coffee placed in the basket, in grams.
- Yield: drink weight collected in the cup, in grams.
- Ratio: yield divided by dose.
- Time: how long the machine takes to reach the target yield.
- Taste: what the drink tells you after you stir it.
Grind is usually the first thing to move while dose and target yield stay fixed. Baratza’s current guide uses 18g in, 36g out, and 25 to 32 seconds as a simple test recipe. Breville describes 18 to 22g as a broad starting dose and a 1:2 ratio as a common starting point.
Treat those numbers as a starting recipe. Your coffee gets the final vote.
Leave temperature for later, once the flow repeats, and only if your exact machine has documented controls. Write down the displayed setting. It's a setting on a screen, and the coffee may see a different temperature.
Prepare the equipment before you judge the coffee
Warm up and clean the setup first, because a cold, dirty, or shifting setup makes grind results hard to read.
Follow the machine's warm-up instructions. A maker may say a heater reaches temperature in seconds, but the portafilter (the handled basket holder), basket, cup, and nearby metal can still affect the first shot. Keep the portafilter routine the same each time.
Brush loose grounds off the basket rim and group area. Flush only when the machine procedure calls for it, and use the same pre-shot routine every time. Make sure the scale fits under the cup and reads fast enough to stop near the target yield. If you're still shopping, see what to look for in an espresso scale.
Use the grinder in its supported espresso range. Retention (old coffee left inside the grinder after an adjustment) can sneak into the next shot. If the grinder manual calls for a purge, run and discard a small amount of old coffee to clear it. How much depends on the grinder and the coffee, so don't assume every grinder holds the same amount.
Stick with one bag of coffee for the session. Switching roast, origin, or age while you change grind turns it into a new recipe.
A puck is the packed coffee in the basket. Grind, dose, and preparation all change how water flows through it.
Choose a dose that fits the basket
Start the dose inside your basket's intended range, and leave internet numbers for other machines out of it.
Breville’s current Bambino pages describe an 18g reference dose in their 54mm system. Flair publishes a 16 to 20g range for its current 58mm basket. Other baskets may use different amounts.
Fill the basket the way you'd fill a cake pan: too much coffee shrinks the empty space above the puck and can press it against the shower screen (the metal screen above the basket). Too little can make the puck behave differently from the basket's design.
Pick one dose inside the supported range and hold it steady during your first grind changes. Weigh the coffee that actually lands in the basket, since a timer setting or the beans in a hopper (the bean container on top) can't tell you that. Old coffee in the grinder can mix with the new or change the output as settings move.
If the puck touches the shower screen before brewing or the portafilter won't lock normally, stop and correct the dose. Grinding can't fix a physical fit problem. If the basket maker gives a capacity or empty-space method, follow it.
If the used puck comes out wet or soupy, check whether a wet espresso puck matters before you change the dose.
Write the chosen dose down to a tenth of a gram if your scale shows it.
Set the drink amount with a ratio
Yield turns “a double shot” into an amount you can weigh.
The ratio formula is:
brew ratio = beverage yield ÷ dry dose
For an 18g dose:
| Target ratio | Beverage yield | Useful starting interpretation |
|---|---|---|
| 1:1.5 | 27g | Shorter, more concentrated starting point |
| 1:2 | 36g | Common baseline for dialing in |
| 1:2.5 | 45g | Longer, less concentrated starting point |
| 1:3 | 54g | Long ratio that may suit a different flavor goal |
Those are math results. The taste still depends on how easily the coffee dissolves, the roast, basket, pressure, temperature, and how evenly the puck brews. Start at 1:2 because it keeps the first test easy to follow. Keep it or move it based on taste.
For a lighter roast, the light-roast espresso guide compares a longer yield while the dose and grind stay fixed.
At the short end, a ristretto (a shorter shot with less drink from about the same coffee dose) uses a lower yield. The ristretto vs espresso guide shows why dose and yield define it, and why no single number marks the line.
Stop the shot by drink weight, and allow for any drip after you stop. If your machine adds two grams after you press the control, stop two grams early and write that down. Buttons that stop by volume are handy, but check what they actually deliver on the scale. The label on the button may not match your recipe.
Prepare the puck the same way
Keep puck prep steady so a grind change shows up clearly.
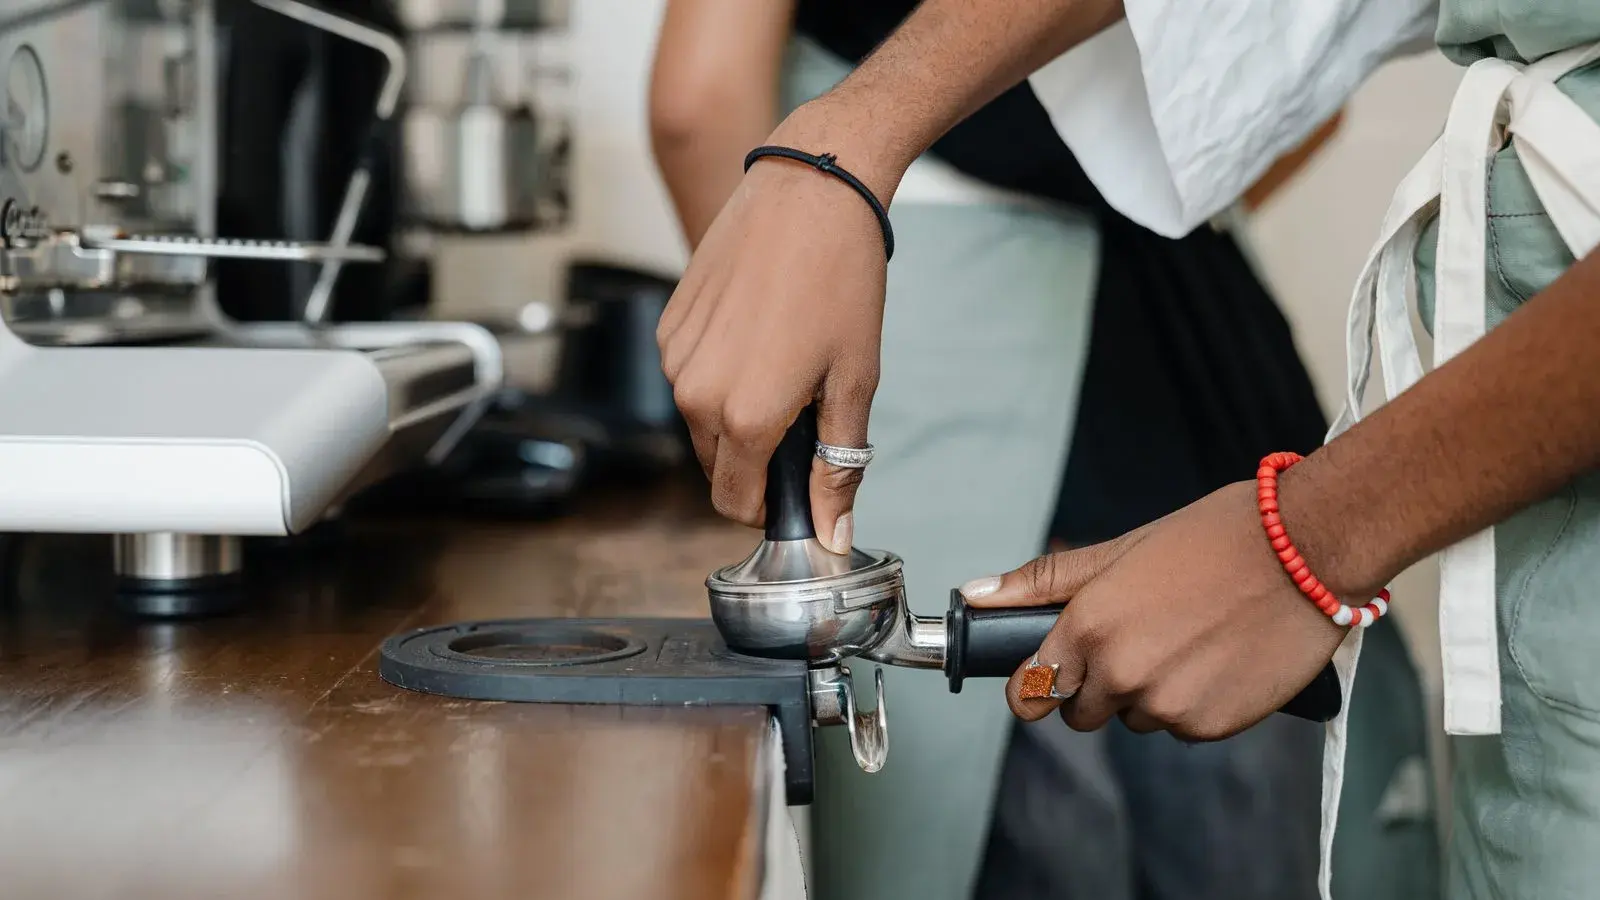
Spread the grounds to smooth out mounds and empty spots. Tamp (press the grounds down) level and consistently. You don't need maximum force; once the puck is pressed, the same level pressure every time does more than extra muscle. Keep the basket rim clean so the portafilter seals normally.
If you use a distribution tool, funnel, or needle, use the same steps and depth on every shot while you adjust. A new tool can change the result and look like a grind change.
Channeling is uneven flow, where water takes easier paths through the puck. It can make a shot look fast, cause spurting from a bottomless portafilter (a holder with no bottom spout), or bring sharp and harsh tastes into the same cup.
Grinding finer won't always help. An uneven puck can get more resistant and still keep its weak paths. Check how the grounds are spread, whether the tamp is level, the dose, and the basket condition before you keep turning finer.
Make the starting shot and log it
Start the timer at the same moment every time. Some recipes start at pump activation. Others start at the first visible drip. Either works if you write down the rule and keep it.
Maker guides often start at activation, so that's the clearest home baseline.
Write it down like a recipe card:
| Field | Example |
|---|---|
| Coffee | Roaster, blend or origin, roast date |
| Machine and basket | Bambino, 54mm single wall |
| Grinder and setting | Encore ESP, setting 15 |
| Dose | 18.0g |
| Yield | 36.0g |
| Time convention | 28 seconds from button press |
| Puck notes | Same distribution and level tamp |
| Taste | Sweet opening, drying finish |
| Next change | One click coarser, everything else fixed |
Stir the espresso before you taste it. Different parts of the brew can settle into layers in the cup, and a sip off the top can mislead you.
One shot is one data point. If the starting shot swings a lot, repeat the same recipe before you touch the grinder. Big differences between shots that should match can come from preparation, old grounds, the machine, or measurement, and a finer setting may not fix any of them.
Use time to watch the flow
Time answers one narrow question: how long did this setup take to reach the target yield under the conditions you wrote down?
A starting window of about 25 to 32 seconds can help you spot a shot that is far from the expected flow. A 15-second 1:2 shot is clearly fast. A machine that stops before reaching the yield is clearly slow. A 24-second or 33-second shot can still be fine, especially when it tastes good and repeats.
Don't stop at 30 seconds just because the clock got there if the recipe calls for more yield. And don't keep going to 36g when the cup already tastes diluted because the ratio says so. Use the starting shot to get the flow under control. Then let taste shape the recipe.
Your timing rule matters too. Say one log includes a ten-second pre-infusion (the early low-pressure wetting stage) and another leaves it out. The numbers will look different even when the flow after the first drip is similar. Write the rule beside the result.
If your machine lets you change that early stage, the pre-infusion guide shows how to record it without mixing timing methods.
Make the first change with grind
Keep dose and target yield fixed, then:
- If the target yield arrives much too quickly, move the grinder finer.
- If the target yield arrives much too slowly or the machine stalls, move coarser.
- If the shot changes from one try to the next, repeat your puck prep before you touch the dial.
Treat the grinder like a stove knob. Turn a little unless the shot is way off. On the Baratza Encore ESP, Baratza recommends its espresso range and notes that small clicks can make large differences.
On grinders with large and small controls, use the large one to get close and the small one to refine. On a continuous dial, mark the old position before you move it.
After adjusting, clear enough old coffee so the next dose reflects the new setting. There's no need to dump a big arbitrary dose, because the amount depends on the grinder. Note whether you purged so you can repeat it.
Pull the next shot with the same dose, yield, puck prep, cup, and time rule. If several things move at once, the cup can't tell you which one mattered.
Check flow and taste together
Judge flow and taste side by side. The old rule says fast shots taste sour and slow shots taste bitter, which makes a fine first prompt for the checks below. Fix a shot runs the same checks on one shot at a time.
| Observation | First check | First controlled move | Why caution is needed |
|---|---|---|---|
| Yield arrives far too fast; shot is thin or sharp | Dose and obvious channeling | Grind finer | Uneven flow can also look fast |
| Yield arrives far too slowly; machine nearly stalls | Dose and basket headspace | Grind coarser | Overfilling can create the same symptom |
| Time repeats but taste is sharp | Ratio, temperature, coffee age | Consider longer yield after grind is stable | Acidity is not identical to under-extraction |
| Time repeats but finish is dry or harsh | Ratio and temperature | Consider shorter yield or a coarser test | Bitterness and astringency are different sensations |
| Shots swing despite same setting | Dose, retention, puck prep, machine routine | Repeat without moving grind | Dial movement can hide the real inconsistency |
| Bottomless portafilter sprays | Distribution and tamp level | Correct puck prep | Finer grind may increase pressure without fixing weak paths |
Taste words are slippery. “Sour” can mean bright acidity, weak sweetness, or an uneven shot. “Bitter” can mean roast flavor, high extraction (the water pulling a lot out of the coffee), or a dry feeling better called astringency. Compare each shot with the last one and describe the change in your own words.
Change the ratio after flow repeats
Once your shots reach a similar yield in a similar time, ratio becomes a clearer taste control.
Pulling a longer yield from the same dose makes the drink less strong and keeps brewing going. One coffee may taste sweeter for it, and another may turn dry. A shorter yield makes the drink stronger and stops brewing earlier. That can calm a dry finish or make sharpness louder.
Move yield in small steps and write each one down. For an 18g dose, going from 36g to 40g changes the ratio from 1:2 to about 1:2.22. That's much easier to read than changing grind, dose, and temperature together.
If the longer yield also changes the total time, that's expected, since the recipe's endpoint moved. Don't reach for the grinder just to force both recipes into the same time range. Taste them first.
Use the espresso ratio calculator for the math, then save the actual dose and yield in Fix a shot. The target is your plan, and the log shows what really happened.
Change temperature only when the machine supports it
Temperature affects extraction, but not every machine lets you change it. And the displayed temperature may not match the measured brew water temperature at the puck.
Leave temperature alone until dose, yield, grind, and puck prep repeat. Otherwise it becomes one more possible cause for changes you already have.
If your machine offers documented temperature settings, move one step at a time and write down the displayed setting. Treat that number like an oven dial: a setting you record, which may differ from the temperature at the puck.
A higher setting can help some coffees extract. A lower setting can change harsh or roasty results. Either way, it's a trial with no guarantee.
Machines without user temperature control can still make repeatable espresso. Keep warm-up and shot steps consistent. If temperature seems to be the limit, look for a controlled review of your exact machine, since advice written for a different heating design may not apply.
Account for coffee age and room conditions
The right grind setting can drift as an opened bag ages. Gas release, moisture, roast, and room conditions can all change how the puck behaves, and humidity and temperature can affect grinding and flow too.
A dial-in doesn't stay put. It's like a soup you make every week: same recipe, slightly different pot. The setting that worked three days ago is today's starting point. Keep the dose and yield that define your recipe, nudge the grind a little, and taste.
Store the coffee the same way, and write down the roast date and open date when you know them. Skip the fixed freshness countdown, because coffee and packaging differ. Watch for a change in flow or taste while the rest of your routine stayed the same.
If two people share one grinder for different coffees, write down both settings and how you purge or swap between them. Decaf and regular coffee can need different positions. Single dosing (grinding only the beans for one shot) makes the bean change clear, while a hopper needs a plan for the coffee left inside.
Pressurized baskets need a different test
A pressurized or dual-wall basket builds resistance into the basket itself. Flow depends less on the exact grind than it does in a single-wall basket, so the finer or coarser rule may be less clear.
That can help when you use pre-ground coffee or a grinder without fine adjustment. It also means a nice-looking shot with crema (the tan foam on top) doesn't prove a well-adjusted single-wall brew, because the basket is doing part of the pressure work. Think of it as a boxed cake mix: forgiving, and quieter about what went right.
Moving from dual wall to single wall? Start a fresh dial-in. Confirm the basket's dose range, move into the grinder's espresso range, set a weighed yield, and expect the old setting to change.
Pick the basket that matches the grinder you have and what you want to learn. A pressurized basket is a fair tool. The two basket types give you different control and different feedback.
Reset when nothing makes sense
When several shots disagree, stop turning the dial and reset. The shot diagnosis questions can help you find what's still moving.
- Clean and dry the basket.
- Confirm the scale and timing convention.
- Return to a known dose and yield.
- Check that the grinder is in its supported espresso range.
- Purge only the documented or observed minimum needed after a change.
- Use the same distribution and tamp.
- Pull two shots without changing anything.
If those two shots differ a lot in time or flow, something besides grind is moving. Look at dose changes, old coffee, channeling, a loose adjustment, an inconsistent machine routine, or an overfilled basket.
If both shots repeat but taste confusing, compare a shorter and a longer yield while the grind stays put. If your machine supports temperature changes, try that only after ratio. If careful changes still don't help, the coffee, water, or machine condition may be the limit.
Try this with three shots
Say your basket supports an 18g dose and your baseline is 36g out.
Shot one: 18.0g in, 36.2g out, 17 seconds from pump activation. It's thin and sharply sour, and the puck prep looks even. Move the grinder finer.
Shot two: 18.0g in, 35.8g out, 29 seconds. Sweeter, with a dry finish. The time looks good, but taste still gets a say, so keep the grind and shorten the next yield.
Shot three: 18.0g in, 32.0g out, 27 seconds. The shorter 1:1.78 ratio is stronger and the finish is cleaner. Save the recipe with the coffee, grinder setting, time rule, and taste note, and stop there once the cup is one you'd make again.
Grind fixed a clearly fast first shot, and yield shaped the taste once the flow made sense. Whether 32g or 36g suits you is up to your own cup.
Repeatable dial-in checklist
Before the shot:
- Match dose to the basket.
- Set a target yield and ratio.
- Use the same warm-up and puck routine.
- Write down the grinder setting and purge steps.
During the shot:
- Time from the moment you chose.
- Stop at the target drink weight.
- Watch for obvious uneven flow, and remember that looks alone can't diagnose a shot.
After the shot:
- Stir and taste.
- Write down time, taste, and prep notes.
- Change one thing at a time.
- Save the recipe when it repeats.
Taste decides whether you pull that recipe again.
If you're wondering whether a shot is one or two fluid ounces, the espresso shot-size guide keeps serving volume separate from drink weight.
Enter your dose, yield, time, and taste to get one small change to try on the next shot.
Open Fix a shot with my measured shot →Products mentioned
Open a product to see its exact source, checked date, known uncertainty, dimensions, and main downside.
Common questions
What should I adjust first?
With dose and target yield fixed, adjust grind first.
How many shots does dialing in take?
There is no fixed number. Repeatable preparation and small controlled changes reduce waste.
What ratio should I start with?
A 1:2 brew ratio is a common starting experiment, and your coffee may want a different one. Use the ratio calculator and taste.

About Mara Ellis
Warm, practical, and lightly witty, Mara turns coffee jargon into clear choices for your counter, budget, and next shot.
Read the profile and guides by Mara Ellis →Sources (6)
- Coffee standards and protocolsSpecialty Coffee Association · Check date not recorded(opens in a new tab)
- How to dial in espresso: the beginner's guideBreville · Check date not recorded(opens in a new tab)
- Dialing in Espresso: Burr Types, Adjustments, and TroubleshootingBaratza · Check date not recorded(opens in a new tab)
- Encore ESP product pageBaratza · Check date not recorded(opens in a new tab)
- Bambino product pageBreville · Checked September 16, 2026(opens in a new tab)
- Encore ESP product pageBaratza · Checked October 20, 2026(opens in a new tab)
See an old price or conflicting detail? Send a correction.
How we researched this
We use manufacturer, standards group, government, and authorized-retailer records when available. We label a hands-on result as an observed test only when we name the exact product and test it. A checked price shows what the seller listed on the check date. It can change after that date, and your delivered total may differ.
What the evidence labels mean
- Source checked
- A cited source stated this fact when Espresso Receipt checked it. This is not a physical product test.
- Estimated
- This is calculated from stated inputs and assumptions. It is not a measured result or a current quote.
- Observed physical test
- This is a hands-on result for the exact unit under a stated test method.
- We could not confirm this
- The available sources do not establish one reliable answer.